List Template blog series:
Part 2 : Basics of List Templates/ List Definitions –
Intelligent approach (Currently reading)
This approach does not need you to write any xml or code, instead it uses some code generation
technique. If you are familiar with MOSS 2007, then you must be aware of
SharePoint Solution Generator or SharePoint
Manager 2007 which can be used to generate list library xml files. In
SharePoint 2010, there is more polished way to do same which I am going to explain
in this post. Note that I have not discovered this approach. Many people are using it and have blogged about it. It is like I am just showcasing it over here again.
Below are the high level steps:
- Create list/ library and customize it according to the requirements through browser.
- Create site template of the site in which list is created using
Save as Site Template feature.
- Download the site template wsp from Solution
gallery.
- Import the downloaded wsps into Visual Studio 2010 using
Import SharePoint Solution Package project which will generate the required
xml files for list/ library.
I prefer and recommend creating list/ libraries using traditional approach. However, you can use this method for creating complex list templates for saving time.
To demonstrate, this time we will create a
Loan Requests custom library template. This template will be associated
with custom Loan Request content type
having custom document template.
Steps:
1. Create a document as shown in figure 1 and name it as
Loan Request Template.
 |
| Figure 1 : Loan Request Document |
2. Create Loan Type, Loan Amount and Loan Reason site columns through browser
in Site Column gallery with the details given in Table 1.
Site Column
|
Type
|
Required
|
Description
|
Group
|
Any other details
|
Loan Amount
|
Currency
|
Yes
|
Enter the loan amount required.
|
SharePoint 2010 Custom Development
|
Currency Format : Rs. (India)
|
Loan Reason
|
Single line of text
|
Yes
|
Enter the reason for which loan is required.
|
SharePoint 2010 Custom Development
|
|
Loan Type
|
Choice
|
Yes
|
Select the loan type.
|
SharePoint 2010 Custom Development
|
Choices:
Educational Loan
Personal Loan
Furniture Loan
Home Loan
|
3. Create the Loan Request Content type as shown in figure 2.
 |
| Figure 2 : Create Loan Request content type |
4. Add the site columns created in step 2 to
Loan Request content type.
5. Click on Advanced Settings link present in
Settings section.
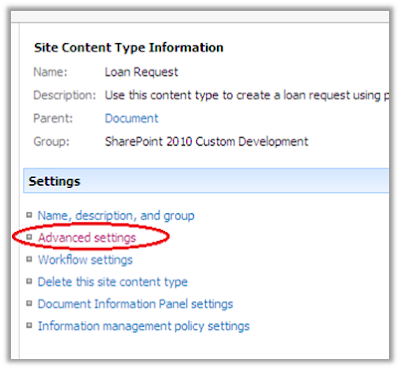 |
| Figure 3: Advanced Settings link |
6. In Document Template section,
select the Upload a new document template
radio button. Click on Browse button to browse and select
Loan Request Template.docx document created in step 1. Then click
OK button on the screen.
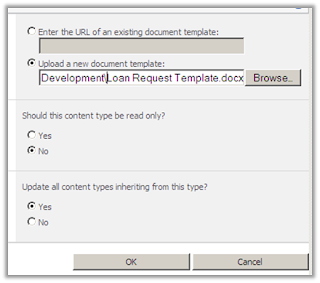 |
| Figure 4 : Upload a new document template |
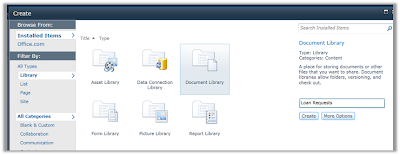
7. Now to create a new Loan Requests
document library, go to Site Actions=>More Options.
 |
| Figure 5 : Create document library |
8. Select the Type as Document Library
and enter the Loan Requests in the
text box. Then click Create button.
This will create a Loan Requests document
library and will redirect you to AllItems.aspx page (All Documents view).
 |
| Figure 6 : Create Loan Requests document library |
9. Click on Library Settings ribbon
button. It will redirect you to List Information page.
 |
| Figure 7 : Library Settings button |
10. Click on
Advanced Settings link present under
General Settings section.
 |
| Figure 8 : List Information page |
11. On the
Advanced Settings page, allow content type management
on Loan Requests document library using the settings shown in below figure.
Then click OK button to save the settings
and to navigate to List Information
page.
 |
| Figure 9: All content type management |
12. In the
Content Type section on the List Information
page, click Add from existing site content
types link.
 |
| Figure 10 : Add from existing site content
type link |
13. Now on
Add Content Types page, add the Loan Request
content type to document library as shown in figure 11. Click
OK button.
 |
| Figure 11 : Add Loan Request content type |
14. In the
Content Type section on the List Information
page, click on Document content type
link to open List Content Type Information page for Document content type.
15. Click on
Delete this content type link. Click
OK button on delete confirmation popup
to delete the Document content type
from Loan Requests library.
 |
| Figure 12 : Delete Document content type |
16. Click on
Loan Requests link on Quick Launch
menu to navigate to AllItems.aspx page
of Loan Requests document library.
17. Click on
Documents ribbon group tab.
18. Click on
New Document and you will see Loan Request Document template. Click on the same.
It will open a document template uploaded in step 6. Note: it also asks for authentication
where you will need to give authentication details of currently logged in user.
 |
| Figure 13 :
Loan Request Document template |
19. Click on
Insert ribbon tab in the document.
It will display Quick Parts button.
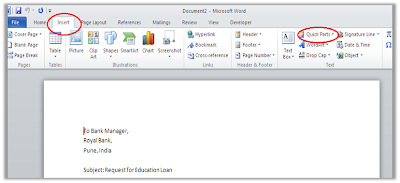 |
| Figure 14 : Quick Parts in the document |
20. Now remove
the Education Loan from the subject
line. Click on
Quick Parts button to insert the Loan Type
document property as shown in figure below as the place of removed Education Loan text.
 |
| Figure 15 : Insert the Loan Type document
property into the template |
21. Similarly,
insert the Loan Reason and Loan Amount document properties into the document so
that it looks like as shown in figure below.
 |
| Figure 16 : Loan Amount,
Loan Type and Loan Reason document properties |
22. Save the
document to the physical file location as New
Loan Request Template.docx.
23. Repeat
the steps 5-6 to upload the newly created New
Loan Request Template.docx document template.
24. Now using
the steps 16-18, create a new document using
Loan Request content type. The document properties like Loan Type, Loan
Reason and loan Amount can set from the document itself as shown in figure 17
 |
| Figure 17 : Enter the Document Property
values |
25. After entering
all the document property values, save the document on the some physical file location
as Parwej’s Educational Loan Request.docx.
26. Now navigate
to the Loan Requests library and upload the
Parwej’s Educational Loan Request.docx document as shown in figure 18.
 |
| Figure 18 : Upload the document |
27. After clicking
OK button, it will show the screen
to set the document metadata properties. If you notice, all the values which we
added previously as document properties are automatically populated as shown in figure 19.
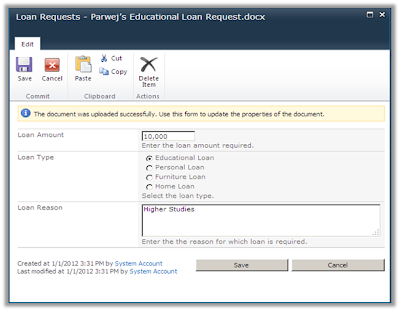 |
| Figure 19 : Edit form of document |
Till now we created site columns, content types, document template for the content
type and document library all through browser SharePoint interface.
Now we will see how to create a Library template using
Loan Requests library and Visual Studio 2010.
28. Go to the
Site Actions=>Site Settings to open
Site Settings page.
29. Click on
Save site as template link present
under Site Actions section.
 |
| Figure 20 : Save as site template link |
Note: Save site as template link will not be seen when SharePoint Server Publishing feature is activated in site. You can deactivate it for some time to save the site as site template and then reactivate it again.
30. On Save
as Template page, click OK button after doing changes shown in figure 21.
 |
| Figure 21: Save as Site Template screen |
31. Once the
site is saved successfully as Site Template, it will display following screen in
figure 22. Click on Solution Gallery in the screen.
 |
| Figure 22 : Site saved successfully as Site
Template |
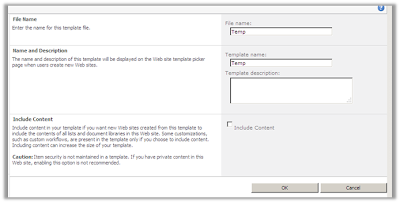
32. Click on
Temp link displayed in Solution Gallery.
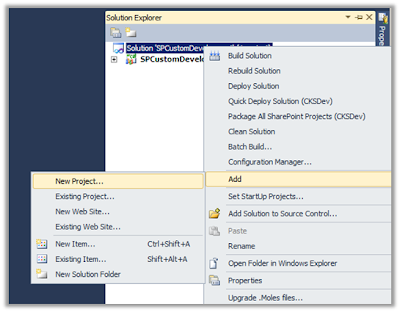
It will ask to save the Temp file. Save it on some physical location.
33. In Visual
Studio 2010, create a SPCustomDevelopment
project using Empty SharePoint Project
template.
Add another project to the solution as shown in figure
below.
 |
| Figure 23 : Add new project |
34. Select
the Import SharePoint Solution Package
project template as shown in figure below and click
OK button.
 |
| Figure 24 : Import SharePoint Solution Package
project |
35. Give any
working SharePoint site url and select Sandboxed trust level in the SharePoint Customization
Wizard screen as shown in figure 25 and click
Next button.
 |
| Figure 25 : SharePoint Configuration Wizard |
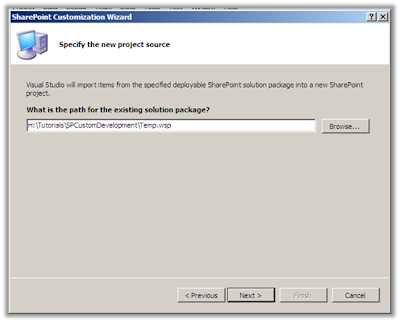
36. On next
SharePoint Customization Wizard screen, browse the path of
Temp.wsp package saved in step and click
Next button.
 |
| Figure 26: Specify the new project source |
37. On
next screen, click on one of the items first. Then use
Right Cntrl + A keys to select
all items in one go. Then click on them to un-check all of them.
38. Select all the artifacts created through browser interface
like Loan Request content type and
the site columns, Loan Request list
instance. In addition, also select _ctsLoan Request_ module.
 |
| Figure 27: Select items to import |
39. The project will look like this.
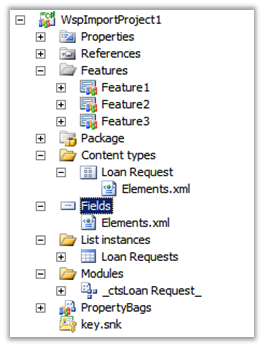 |
| Figure 28 : Imported Project |
40. Now delete the
3LoanrequestTemplate.docx
from the Modules as shown in figure 29.
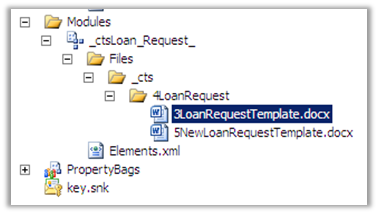 |
| Figure 29 :
Delete unnecessary document template |
41. Copy paste the Fields, Modules and Content Types folder
from WspImportProject1 to
SPCustomDevelopment project.
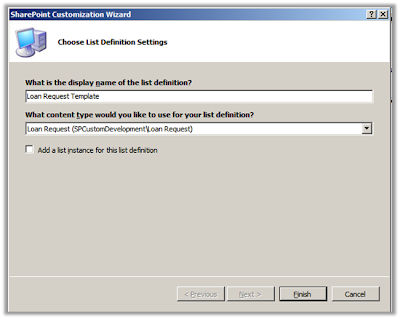
42. Now Add a List Definition
From Content Type project item to the SPCustomDevelopment
project.
 |
| Figure 30 : Add List Definition From Content
Type project item |
43. Make the following changes
Choose List definition Settings screen.
 |
| Figure 31 : Choose List Definition Settings |
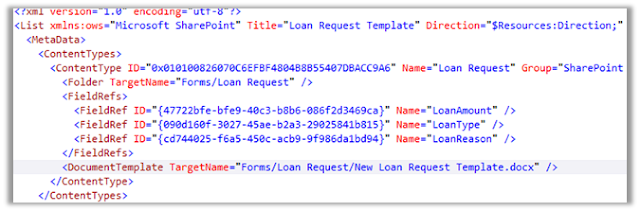
44. Open the
Schema.xml file of Loan Requests Template.
Change the _CTS to
Forms in Folder and Document Template tags as shown in below figure. This
will prevent the error which says that only Forms folder have ability to store document
templates.
In addition, in List tag add EnableContentTypes="TRUE" attribute.
 |
| Figure 32 : Schema.xml changes |
45. Add Site
Columns, Content Type and List Template features and associated them with the element
manifest so that package designer will look like this.
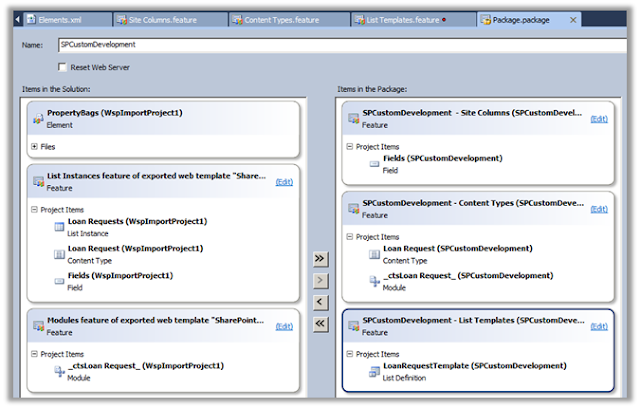 |
| Figure 33 : Package Designer |
46. Navigate
to site and delete all the site columns, content type and list instance created
through browser.
47. Deploy
the SPCustomDevelopment project as
shown in below figure.
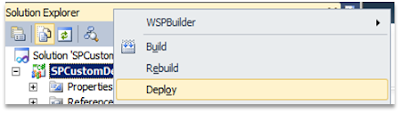 |
| Figure 34 : Deploy Project |
This will create new custom “Loan Request Template”.
48. Navigate
to site and create a new document library by selecting the Loan Request Template
as shown in figure below.
 |
| Figure 35 : Create Loan Request list instance |
49. It will
have the Loan Request document template by default associated as shown in figure
below which will open our created custom document template.
 |
| Figure 36: Create document using custom
document template |
I hope using above mentioned approach, you will be able to create complex list/ library
templates very easily. Above example also covers how to create custom document templates.
The post was a long one. Time for a much needed break!


